August 21, 2023
New York-Style Gluten Free Bagels
Prep time:
30 min
Cook time:
25+ min
Total time:
overnight rest
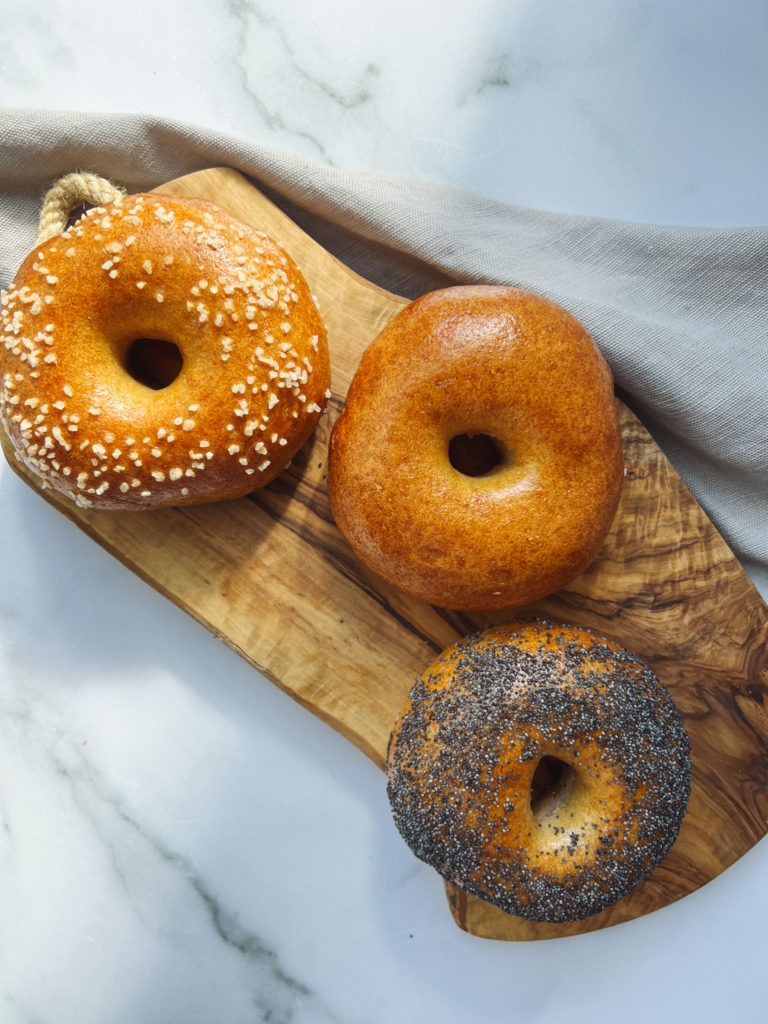
New York-Style Gluten Free Bagels
Elevate your breakfast game with our Gluten-Free New York Style Bagel Recipe, made with Hand + Heart Gluten Free Artisan Flour Blend. We’ve packed everything you need for these incredible, traditionally boiled bagels right into one bag, so no need to hit the town in search of elusive gluten-free flour.
Crafted in true New York style, these bagels are all about that soft and chewy goodness we crave. The secret? An overnight rise that transforms them into the epitome of bagel perfection. Boil, bake, and voila – you’re in for a gluten-free bagel experience that’s the real deal.
These bagels are not just gluten-free; they’re also egg-free, dairy-free, wheat-free, and grain-free, thanks to the wholesome touch of buckwheat flour. Customize your batch with everything seasoning, cheese, sesame seeds or keep it classic and plain.
Here’s the best part: they freeze like champs. Cross-cut, toss them in a zip bag, and into the freezer they go. When the craving hits, pop one in the toaster for a warm, crispy delight. With our Gluten-Free NY Style Bagels, you’ve got the taste of New York at your fingertips, minus the gluten and the hassle. Rise, boil, bake, and enjoy!

New York-Style Gluten Free Bagels
Prep time:
30 min
Cook time:
25+ min
Total time:
overnight rest
Yield:
8 bagels
Author:
made by hand, from the heart
Ingredients
For the Dough:
- 3 cups (500g) Hand + Heart Gluten-Free/Grain-Free Artisan Blend
- 2 teaspoons (12g) salt
- 2 1/4 teaspoons (7g) instant or active dry yeast
- 500ml (500g) warm water (about 110ºF)
- 1 tablespoon (20g) sweetener (honey, agave nectar, maple syrup, etc.)
- 2 tablespoons (20g) vegetable oil
- 2 teaspoons (9.6g) apple cider vinegar
For the water bath:
- 3 liters/quarts (12 cups) water
- 3.5 tablespoons (45g) brown sugar
- 1 1/2 tablespoons (25g) baking soda
Instructions
Make the Dough:
- Combine all of the ingredients in a bowl of a stand mixer. Mix with a spatula to combine and beat everything together with a dough hook on a medium speed for 10 minutes stopping midway to scrape the bottom and sides of the bowl. If you do not have a mixer, just stir with a wooden spatula or dough whisk for 10 minutes until dough is smooth. It will be very sticky.
- Remove the dough hook and gather the dough into a ball inside the mixing bowl. The dough will be very sticky but smooth. Let the dough rest inside the bowl covered with a dish towel for 30 minutes.
Shape the Bagels:
- After resting, prepare your work surface by lining your counter with a plastic wrap or by placing a large silicone kneading mat on the counter. Oil the surface of the plastic wrap or silicone kneading mat with vegetable oil.
- Shape the dough into a log and divide into 8 equal portions.
- Round divided dough into a ball and flatten slightly. To shape the dough into a ring, use your finger to make a hole in the center and move the dough in a circular motion to enlarge the hole in the center. You can also use a small rolling pin and use it to make a hole in the center. Move the dough a circular motion with the rolling pin in the center to widen the opening. You need to make sure the hole is at least 1.5 inch wide to make room for proofing.
- Place a parchment paper on 2 baking trays or 1 full size baking tray. Place the bagels on the baking tray spacing them at least 3 inches apart.
- Cover with plastic wrap and let rest in the refrigerator overnight.
Boil & Bake the Bagels:
- Once ready to bake, remove trays of bagels from the refrigerator and let come to room temperature for at least 30 minutes.
- Preheat the oven to 450ºF for at least 30 minutes. Line 2 regular sized baking trays or 1 large baking tray with parchment paper.
- Bring a large pot of water to a boil. Add the brown sugar and Baking Powder and stir. Reduce the temperature so it’s just barely simmering.
- Cut the parchment paper in between the bagels so each bagels are on it’s own paper. Lift up the parchment paper with bagel and gently lower a few bagels into the boiling water, being careful not to overcrowd the pot. Boil for about 1-2 minutes on each side. The bagels will puff up slightly and the water may bubble vigorously. Remove the paper once you flip the bagel on the other side.
- Use a slotted spoon to carefully lift the boiled bagels out of the water. Allow them to drain briefly on a clean kitchen towel or on a wire rack before transferring bagels onto a lined baking tray. Space the bagels at least 3 inches apart.
- If you’re using toppings like sesame seeds or poppy seeds, sprinkle them over the bagels right after boiling, while they’re still moist. The toppings will stick to the bagels as they bake.
- Bake the bagels in the preheated oven until they’re golden brown and have a slightly crisp crust, typically around 18 – 25 minutes. The exact baking time may vary depending on your oven.
- Once baked, let the bagels cool on a wire rack for a few minutes before slicing and enjoying them with your favorite spreads or toppings.
Remember, the boiling process is what gives bagels their distinct texture and flavor, so don’t skip this step! Whether you’re making plain, sesame, poppy, or any other type of bagel, these instructions will help you achieve bakery-worthy results from your own kitchen.
Keywords: new york style gluten free bagels

